blog 2021 6 min read
Six easy steps to get started with disguise Designer
disguise Designer is an intuitive piece of software for many production professionals. But, if you’re after a jump-off point to get started, we’ve pulled together six steps everyone can take at the start of their Designer journey.
In our ‘Introduction to Designer’ webinar, we invited the community to discover how they can get up and running with Designer and see how they can use disguise to preprogram, set up, operate and run their next production. Participants got a taste of a Designer fundamental training session and saw first hand how quick and easy it is to get started with the Windows-based software.
If you’re looking for a no-nonsense, stripped-back guide to getting into Designer from the ground floor, we’ve highlighted six of the simple first steps anyone would need to take on their path to becoming seasoned experts.
Watch the 'Introduction to Designer' webinar
1. Download Designer software
If there ever was a perfect time to discover Designer, it is now. We’re offering licences to the full version of Designer for free until 1 August 2022. You can claim the software licence from the download page of our website.
We also advise you to download the free media pack of sample images, models and videos. The pack provides customers with content to use as they learn Designer. It’s available as a demo project from resources on our downloads page.
Download Designer and start your disguise journey
2. Familiarise yourself with disguise Manager
The starting point for using Designer is disguise Manager. This is where all your projects and files are maintained. Begin by creating a new project, name it and open the folder to store all the content, media and elements needed for a project: audio, textures, meshes, generative content, video. Drag and drop the media pack you’ve downloaded into disguise Manager, and you’ll be able to access its sample content. Manage content, move content between files and even move content between machines here. To start running a project, simply select the project, then click run.
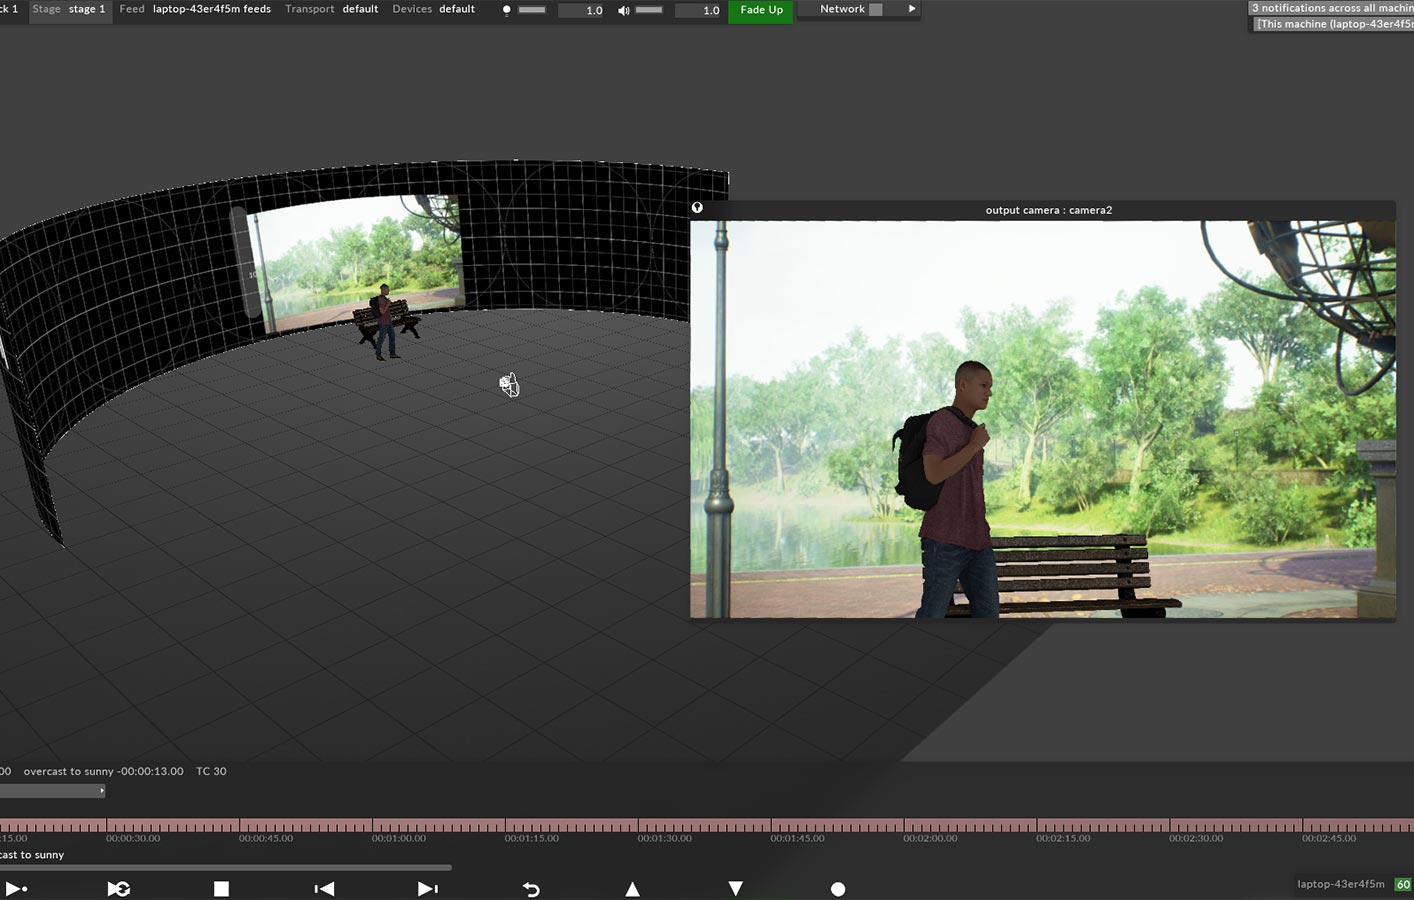
3. Pre-visualise any project
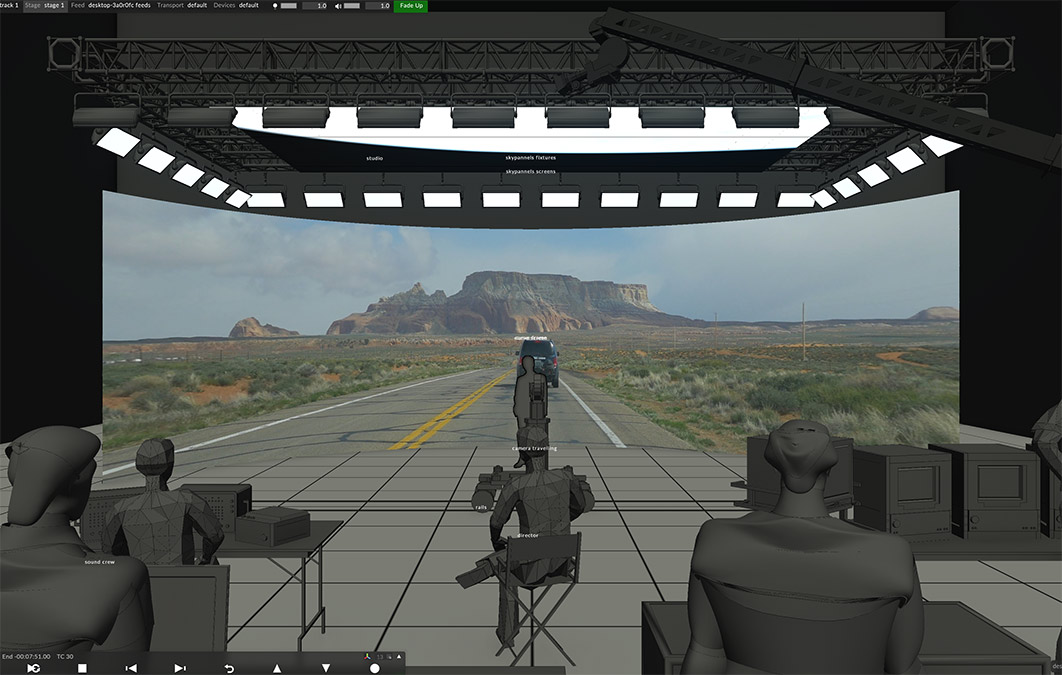
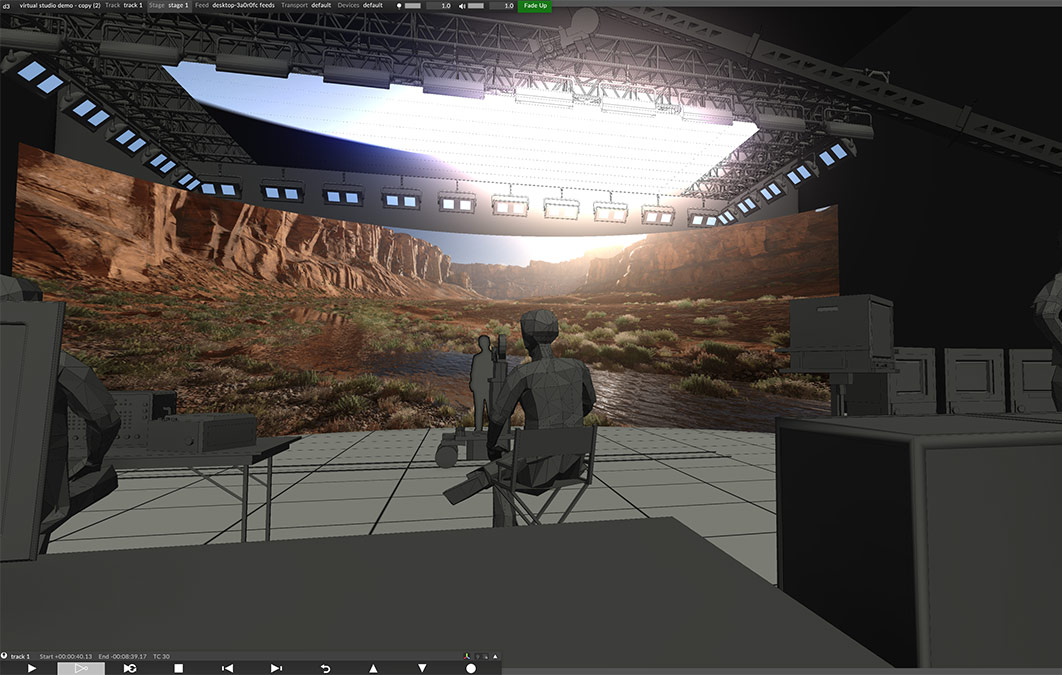
With Designer, users can see a 3D representation of their stage view. This stage view allows you to pre-visualise and preprogram everything, letting you get the project running before you even arrive on-set or at the venue. This ensures everything is in its proper place, saving time, energy and money when loading in or building the set.
You will begin with an empty project and populate the main stage with the elements that replicate their real-world layout: a projector and projection surface or multiple LED video screens, for example. Everything is set up as accurately as possible in this 3D environment.
A timeline at the bottom of the screen is divided into frames. Different timeline tracks represent different events, and transport controls start and stop events and jump between sections on the track. At the top of the screen, a dashboard offers a series of menus and options. Users control the camera with the mouse, and keys F2 through F11 are programmable. While F12 is the default camera position and F1 is reserved for an extensive keyboard shortcuts menu.
Discover the benefits of pre-visualisation
4. Create layers, outputs and customise the stage
Once the stage view is set and you’ve familiarised yourself with the intuitive controls, the 3D environment comes alive.
Layers of still images, moving graphics, and video clips add interest and visual excitement to any project. With Designer, you’ll be able to quickly create a layer by using the timeline to name the layer, choose what type of content to add and select media from the content file, which immediately appears on the stage’s 3D screen.
To output a single video layer, users simply drag and drop a source to a real-world output, such as a media server, using the feed view function. Icon-driven options control position, clip, crop and flip images.
The stage edit menu enables you to tailor your set and scenery, adding LED video screens, DMX screens, lights, projection surfaces, projectors, cameras and more. Controls set scale and resolutions and reposition and manipulate objects in 3D space. Everything that’s part of the real-world stage can be visualised on the screen, meaning there are no surprises further down the line because the pixels you see in Designer will be the same ones you see on the LED panels come showtime.
5. Map layers onto objects
Different types of image mapping attach still and moving images to screens and other set pieces, and Designer offers a wide range of mapping types to fit every need. Direct map images that stick to a screen or surface even if it moves on stage. Or parallel map images and create emissive surfaces where images are fixed in space. It’s also possible to crop and stretch images to fit the display or use the pixel perfect function to match the resolution of each screen and get an accurate, to the pixel, view of the real-world output.
Find out about mapping content
6. Enhance the setup
Customers seldom stop at creating and mapping a single layer. They want to add multiple layers of still and moving imagery and use the blend mode to create a hybrid image or composite imagery with alpha channel support.
Since it’s essential to see the stage or set in an actual real-world space, users can access the venue feature to bring up the environment as it would look in a big arena, for example. Give a sense of further realism by dressing the stage with a series of props that consists of any .OBJ file imported into the system, like a band’s drum kit placed in front of the main screen where it will be located during a live music concert.
Finally, discover how to implement track sectioning to start a new cue or new event. You can use transport controls to run content in a continuous loop or jump into the next section with multiple cues. There’s an option to cross-fade between cues, put in a global cross-fade that affects everything in the project, or go to individual tracks and apply track-based cross-fades. These finishing touches deliver an accurate representation of how a project plays out, so creatives are never surprised at showtime.
See how the disguise Timeline works
Mastering these first steps in Designer and completing those presented in the webinar will give you the best possible springboard to launch your Designer learning experience. However, to continue getting the most from the software, it is crucial to continue exploring and learning. Our central learning management system lets new and existing users register for free elearning, watch video tutorials, find local certified trainers and, sign up for in-person classes when face-to-face training resumes. You’ll also find an interactive user guide packed with helpful information. Discover how Designer enables customers to create and deliver the spectacular visual experiences today’s audiences demand.
What to do next: